Finding Colours - Part 3: WebAssembly to the rescue
We left off part 2 with code that worked and gave good results but was disastrously inefficient, taking minutes to finish the algorithms run on higher-resolution images. In this post, we’re going to try and move some of the more computationally heavy code into WebAssembly to try and fix this issue.
This was originally going to be 2 posts, one for optimizing the JS and a second for the WebAssembly application building. Given it’s been 3 months since I last posted, probably best not to try and delay it any longer. So buckle up, this is going to be a long one.
Note: After going back and giving this a read over I realise now the majority of this post is introducing basic concepts in Rust, if you want to skip this and go straight to measuring the results, feel free.
Update: You can check out the project page to see a live demo of the application in action
Measuring the problems
So to start with this, we’ll need some numbers. I have some idea of where the problems in the code lie but I want to back this up with some numbers before I start making changes.
To test the theory we can do basic timing checks on parts of the code by wrapping sections with start and finish console.time and console.timeEnd1 like so:
console.time('Calc new clusters');newClusters = calcNewClusters(kClusters, colorData);console.timeEnd('Calc new clusters');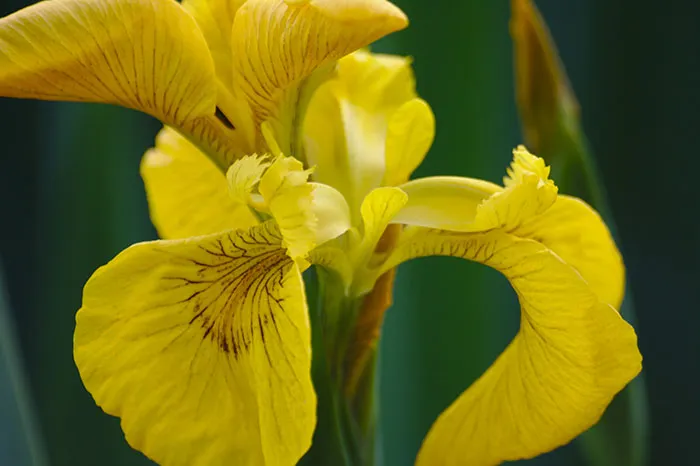
I picked out 3 areas of the code to start with; the creation of the image data from the bitmap, the calculation of new clusters seen above, and the calculation of the distance shift. The results of a run of this are shown below:
Build color data: 297.05908203125 msCalc new clusters: 9948.283935546875 msCalc distance shift: 0.06103515625 msCalc new clusters: 8286.53271484375 msCalc distance shift: 0.02099609375 msCalc new clusters: 8091.48095703125 msCalc distance shift: 0.009033203125 msCalc new clusters: 7912.260986328125 msCalc distance shift: 0.010009765625 msTime taken: 34540msI wasn’t surprised that the distance shift calculation was quick, as this isn’t particularly difficult for the system to run. I was more surprised at how quick the colorData was to create:
console.time('Build color data');
createImageBitmap(file).then((ibm) => { // ...snipped
colorData = colorData.map((v) => { const rgb = v.split(","); return { r: parseInt(rgb[0]), g: parseInt(rgb[1]), b: parseInt(rgb[2]), }; });
console.timeEnd('Build color data');I was expecting this to be more take a lot longer than the <300ms time being shown, we may come back to this later as it could probably be optimized further, but for the moment there is one stand-out section of the code that needs optimizing, the new clusters calculations.
Averaging at eight seconds per iteration the problem is somewhere inside the calcNewClusters function so let’s add some logging to the function and measure where the potential bottlenecks might be.
console.time('reducer');const clusteredData = colorData.reduce( (prev, curr) => { console.time('iteration'); const distances = kClusters.map((k) => calcEuclideanDist(k, curr)); const minDistance = distances.reduce( (a, b) => Math.min(a, b), Infinity ); const selectedK = distances.findIndex((e) => e === minDistance); prev[selectedK] = [...prev[selectedK], curr]; console.timeEnd('iteration'); return prev; }, Array.from({ length: 8 }, () => []));console.timeEnd('reducer');An average run-through with the image looks something like this:
iteration: 0.202880859375 msiteration: 0.218994140625 msiteration: 0.277099609375 msiteration: 0.27294921875 msiteration: 0.219970703125 ms// ...iteration: 0.218017578125 msiteration: 0.2060546875 msiteration: 0.205078125 msiteration: 0.2138671875 msreducer: 11819.55908203125 msThe above shows the problem with the approach we’ve taken, there’s nothing particularly taxing in each of the iterations we’re running through, it’s just we do so many of them that the code takes so long to complete. There are a few things we could do to try and optimize this but at the end of the day we still need to make a large number of calls to these calculations that will only get worse if we ever try this with larger images, so what are the alternatives?
WebAssembly to the rescue
WebAssembly (abbreviated Wasm) is a binary instruction format for a stack-based virtual machine. Wasm is designed as a portable compilation target for programming languages, enabling deployment on the web for client and server applications.2
In a nutshell, WebAssembly is a low-level assembly language (encoded into a load-efficient binary format) that runs on a virtual stack machine and promises to give native speeds as well as executed in a memory-safe sandboxed environment. WebAssembly has compile targets from several languages at this point; Go, C, and C++, I personally Rust makes the most sense to use at this point for a few reasons.
- Memory safety: This is the big win of Rust over C++ we get language-based guarantees against one of the most often hit class of bugs that creep into C++ projects.
- Small binary size, with no runtime required Rust wasm modules are much much smaller than the Go equivalent which requires a stripped down version of the Go runtime to be compiled in.
I’ve been looking for more reasons to use the Rust programming language and right now it seems like one of the best options available for creating Wasm modules.
What should our module do?
The First step then is to decide which part of our code we should replace. The obvious choice is the calcNewClusters function which as we saw above is the main time sink for our program. Replacing just this function though would require a lot of passing back and forward between Wasm and our JS code, instead, I’ll look to replace the entire do/while loop with a single call to Wasm which will return the completed array of strings we’ll use to generate the colour swatches from;
do { newClusters = calcNewClusters(kClusters, colorData);
newClusters.forEach((v, i) => { distanceShift += calcEuclideanDist(v, kClusters[i]); });
distanceShift = distanceShift / newClusters.length;
kClusters = newClusters; iterations += 1;} while (distanceShift >= 5 && iterations < 10);const result = wasm.find_colors(colorData, kClusters);Rust WebAssembly
I’m going to use the wasm-pack template repository. I’m not going to go over this too in-depth other than to say it’s a rust template project that uses wasm-pack which is a build tool for rust that runs cargo with options for outputting to WebAssembly.
The wasm-pack tool has changed somewhat since this guide was first produced so it may be a good idea to follow steps from the official site linked above rather than the setup steps in this guide. All of the functional code is still valid though.
Let’s start going through our lib.rs module file that contains what will become our Wasm module, starting with our crate imports:
use serde_derive::{Deserialize, Serialize};use utils::set_panic_hook;use wasm_bindgen::prelude::*;use web_sys::console;serde_derive3 gives us the Serialize and Deserialize traits, these are used to serialize our structs into JS objects (we also have the serde_wasm_bindgen crate but this doesn’t require its own import)utilsthis is a local module created for us that contains the set_panic_hook function we’ll talk more about laterwasm_bindgen::preludethis gives us the JsValue type we’ll be using for importing and exporting values to JSweb_systhis crate gives us access to the JS host console we’ll use this to log out our timings as we do in our JS implementation
We need a way to represent our colours internally in the Wasm so let’s create a struct to do this, we’re going to define our red, green, and blue components as signed integers and add the Serde traits, I won’t go over exactly what traits are here for now just think of them as the equivalent of interfaces in other languages and the derive keyword as a way of giving a basic automatic implementation of them:
#[derive(Deserialize, Serialize)]struct Color { r: i32, g: i32, b: i32,}Next, we’ll add the function to calculate euclidean distance, it’ll take in two of our Colors and return a float for the distance. You’ll notice this function looks almost identical to its JS equivalent the only difference being the types needed on the function parameters and the square root and power functions coming from their associated number types rather than a common Math module:
fn calc_euclidean_dist(p: &Color, q: &Color) -> f32 { f32::sqrt(( i32::pow(p.r - q.r, 2) + i32::pow(p.g - q.g, 2) + i32::pow(p.b - q.b, 2) ) as f32)}One thing to note here is the parameter types here are annotated with a &, this indicates that we’re borrowing (passing by reference) rather than taking ownership of these Color objects. Ownership4 is a big topic in Rust, more than I can go into here but we can sum it up as, by enforcing strict rules at compile time about when data is created and destroyed, we can guarantee memory safety throughout the code.
Also, note the lack of a return statement here in this function despite there being a noted return type of f32 (32-bit floating point number), Rust implicitly returns statements that don’t end with a semi-colon.
So far so simple, let’s go up (down?) one level to the Rust version of the calcNewClusters function starting with the function signature:
fn calc_new_clusters(k_clusters: &Vec<Color>, color_data: &Vec<Color>) -> Vec<Color> {Ok, new concept here the Vec. Vectors in Rust are a growable array type, we use vectors rather than arrays here because we won’t know the size of the collection at compile time. Once again we’re borrowing the vectors for our k-clusters and colour data, we’ll also return a new vector containing the new clusters discovered by our algorithm, just as we did with the JS version.
The first line of this function is worth talking about on its own, as there are a couple of new concepts here:
let mut new_clusters = vec![vec![]; k_clusters.len()];Rust uses the let keyword to create new variables in the current scope in this case new_clusters. Variables in Rust we’ve looked at until now have all been immutable, as this is the default, we use the mut keyword here to define the variable as mutable. This default mutability also has implications for passed-in parameters, and how this works given Rust’s borrow checker, as we haven’t needed to mutate any function params up until now we won’t be looking at that for the moment.
The second new concept is that of the macro. Function-like macros such as this can be identified by the ! at the end of their name and can be thought of as “code that writes other code”, in this case, a shortcut for creating new vectors with a specific set of parameters. This reads as, a vector with an initial capacity of the length of our k_clusters parameter, and will be filled with an empty vector initially.
We create our new_clusters vector up-front because we’re going to use this instead of the clusteredData temporary collection we used on the JS side, we’ll look at why later bit for now. Let’s look at the generation of this 2D vector:
for color in color_data { let distances = k_clusters .iter() .map(|k| calc_euclidean_dist(k, color)) .collect::<Vec<f32>>();
let min_distance = distances.iter().fold(f32::INFINITY, |a, &b| a.min(b));
let selected_k = distances.iter().position(|&r| r == min_distance).unwrap();
new_clusters[selected_k].push(color);}Let’s go through this then; in (1), the for/in syntax here lets us borrow each item from the color_data vector and perform operations using them similar to the JS for/in.
There’s a lot going on in this next line (2). We start with our k_clusters vector and call .iter() to give us an iterator that yields every item in the vector in order. There’s new syntax in the next call to .map(), the double-pipe syntax signifies a closure that takes each element of the iterator and transforms it in some way, map finally returns a new iterator based on this transformation. Here we’re using our calc_euclidean_dist function, passing it in our current element from the iterator, and the current Color from our for loop.
The final statement here transforms our iterator back into a collection, .collect::<Vec<f32>>() we use what’s called the turbofish syntax here to help the compiler inference algorithm know what the final type of this collect will be. Thus we end up with a vector of f32s that represents this colour’s distance to each of the k-clusters, phew.
The next 2 lines (3, 4) have direct equivalents in our previous JS example:
const minDistance = distances.reduce( (a, b) => Math.min(a, b), Infinity);const selectedK = distances.findIndex((e) => e === minDistance);There is one thing we should touch on before moving on, a the end of line (4) unwrap(). The previous call .position(...) has the return type Option<usize> that is it may return an index as Some(usize) or None if this item is not found in the iterator. unwrap takes the Some and gives us the usize index, it should be noted that this can potentially panic (error out) if position() returns None however, we’re safe to use it in this instance as there will always be a minimum index.
In (5) here we push our colour into our new_clusters vector under the selected cluster from our pre-defined k-clusters.
The final part of this function is again a one-for-one equivalent of the JS code, I’ll just show the code listing here as there isn’t anything new to talk about:
new_clusters .iter() .map(|c_list| { let mut r = 0; let mut b = 0; let mut g = 0;
c_list.iter().for_each(|color| { r += color.r; b += color.b; g += color.g; });
Color { r: (r / c_list.len() as i32), g: (g / c_list.len() as i32), b: (b / c_list.len() as i32), } }) .collect()Our entry-point
So now we have the 2 basic external functions of the code, let’s look at what will be the entry point of our Wasm module find_colors, I’m not going to go through this line by line, but I will talk about the numbered lines here in varying levels of detail and call out anything we’ve not seen already:
#[wasm_bindgen]pub fn find_colors(color_data: JsValue, k_clusters: JsValue) -> JsValue { set_panic_hook();
let colors: Vec<Color> = serde_wasm_bindgen::from_value(color_data).unwrap(); let mut clusters: Vec<Color> = serde_wasm_bindgen::from_value(k_clusters).unwrap();
let mut iterations = 0; let mut distance_shift = 0_f32;
loop { console::time_with_label("Calc new clusters"); let new_clusters = calc_new_clusters(&clusters, &colors); console::time_end_with_label("Calc new clusters");
console::time_with_label("Calc distance shift"); for i in 0..new_clusters.len() { distance_shift += calc_euclidean_dist(&new_clusters[i], &clusters[i]) } console::time_end_with_label("Calc distance shift");
distance_shift /= new_clusters.len() as f32;
clusters = new_clusters;
if distance_shift <= 5_f32 || iterations >= 10 { break; }
iterations += 1; distance_shift = 0_f32; }
JsValue::from( clusters .iter() .map(|c| format!("#{:02x}{:02x}{:02x}", c.r, c.g, c.b)) .map(|s| JsValue::from(&s[..])) .collect::<js_sys::Array>(), )}The first line then (1), is known as an “attribute” in Rust, this one wasm_bindgen annotates this function as something that should be exposed publicly to JS. The function signature then (2) starts with the pub keyword, letting rust know that this function is public rather than the default private and available outside of this module. We also have a type declaration for our parameters JsValue (remember our wasm_bindgen::prelude import? It comes from there). This represents an object type that can be imported from or exported to JS. Our function also has a return type of JsValue that we’ll use to return our gathered colour swatches to JS.
set_panic_hook call (3), is an auto-generated method we get for free with the wasm-pack template, invoking this method adds a hook to Rust’s panic system that logs these errors into the JS console rather than just killing the app. This does add quite a large overhead in code size to the final .wasm bundle but is handy for debugging during development.
The first two assignments in this function then (4) take our passed in JsValues and use the serde_wasm_bindgen crate to transform them into Color vectors. There is a built-in function within the wasm_bindgen crate to do this however the function is currently deprecated in favour of the Serde solution. We assign clusters as mutable here since we’ll be updating this with every iteration using it to store the found clusters. Both of these statements also end with unwrap() as the deserialization between JS and our Rust vector may fail.
distance_shift (5) we mark as an f32 (32-bit floating point number) with the _f32 suffix, we could also have written this like 0.0 and let the compiler infer the type but I wanted to show this syntax.
Rust has no do/while syntax so we’re going to use the infinite loop (6) statement with a conditional break to exit when our distance shift or iteration limit is reached (9).
(7) is simply calling the web_sys crate’s console function that gives us JS time and timeEnd we’ll use to time function execution the same way we did in JS land.
We’ve seen for loops before but I wanted to call out the range syntax here 0..new_clusters.len()(7) this gives us a range of usizes between 0 and the length of new_clusters (non-inclusive) that we’ll use in favour of the forEach from JS:
newClusters.forEach((v, i) => { distanceShift += calcEuclideanDist(v, kClusters[i]);});Last up our return (10). We’ve seen iter and collect before let’s take a look at these maps though, the first one uses the format macro to create a Rust String that represents the hex value of this colour, we then create a JsValue from this string in the second. Finally, this gets collected into a JS array type and wrapped in a JsValue that we can return to the Javascript side.
And that’s it. I won’t post the entire code listing for this module again as it’s a bit long but you can find it in the project’s GitHub Repository.
Compiling Rust to Wasm
So we have our Rust module code, we need to compile this into something that we can import into our JavaScript module. To do this we use the wasm-pack tool.
$ wasm-pack build[INFO]: 🎯 Checking for the Wasm target...[INFO]: 🌀 Compiling to Wasm...# ...Snipping compile modules Compiling colors-wasm v3.0.0 (/Users/colinmcculloch/devel/image-colours/colors-wasm) Finished release [optimized] target(s) in 31.28s[INFO]: ⬇️ Installing wasm-bindgen...[INFO]: ✨ Done in 32.68s[INFO]: 📦 Your wasm pkg is ready to publish at ./pkg.I snipped a lot of the compile messages here but the process took a total of about 30 seconds, as we can see it created our package in a pkg directory. Let’s have a look at the contents of that:
pkg/├─ colors_wasm_bg.js├─ colors_wasm_bg.wasm├─ colors_wasm_bg.wasm.d.ts├─ colors_wasm.d.ts├─ colors_wasm.js├─ LICENCE├─ package.json└─ README.mdSo we have our binary here colors_wasm_bg.wasm as well as some JS glue code in colors_wasm_bg.js and the file we will use as our JS import colors_wasm.js. We also get an auto-generated package.json that would allow us to push this package to a repository such as NPM.
Importing Wasm to JS
So in the code seen above, we’ve added timing logs the same way we did to the JS side, this should give us a direct comparison of times taken for various sections of the code to execute and see how much of a speed-up this module has given us.
I’m going to make some quick changes to the existing code, mostly moving the JS out into its own module file index.js. This just makes it easier to import our wasm code with the line:
import * as wasm from 'colors-wasm';We load this file from a bootstrap.js:
// A dependency graph that contains any wasm must all be imported// asynchronously. This `bootstrap.js` file does the single async import, so// that no one else needs to worry about it again.import("./index.js") .catch(e => console.error("Error importing `index.js`:", e));I haven’t pushed the wasm module to any code repository yet so I’ll just bring it in as a relative import in the package.json:
"dependencies": { "colors-wasm": "file:../colors-wasm/pkg"}The code change to use this module is as simple as the one line I posted above (with a few small alterations to the colour swatches display):
const result = wasm.find_colors(colorData, kClusters);
const swatches = document.getElementById("swatches");swatches.textContent = "";
for (let i = 0; i < result.length; i++) { let swatch = document.createElement("span");
const color = document.createTextNode(result[i]); swatch.appendChild(color); swatch.classList.add("p-2"); swatch.classList.add("mb-2"); swatch.style.backgroundColor = result[i];
swatches.appendChild(swatch);}result in this case, is the array of strings we pass back from the Wasm module, so we’ve no need to translate these from raw colour numbers the way we did before.
Measuring the results
Ok now we’re ready for the face-off with our old JS implementation, remember we’re working with the image above a 700x466 jpeg ~82kb. An average run on my machine might look something like this:
Build color data: 386.304931640625 msCalc new clusters: 7964.244140625 msCalc new clusters: 7465.383056640625 msCalc new clusters: 7418.43798828125 msTime taken: 23257msNow let’s try this same image in the Wasm version of the code:
Build color data: 559.1220703125 msCalc new clusters: 15.107177734375 msCalc new clusters: 15.216796875 msCalc new clusters: 15.80810546875 msTime taken: 759msWow! I actually had to go back and double-check this but everything seems correct, so that’s a 30x speed-up for the total calculation! This is so fast in fact that we can run much larger images through it and still beat the performance of the JS code.
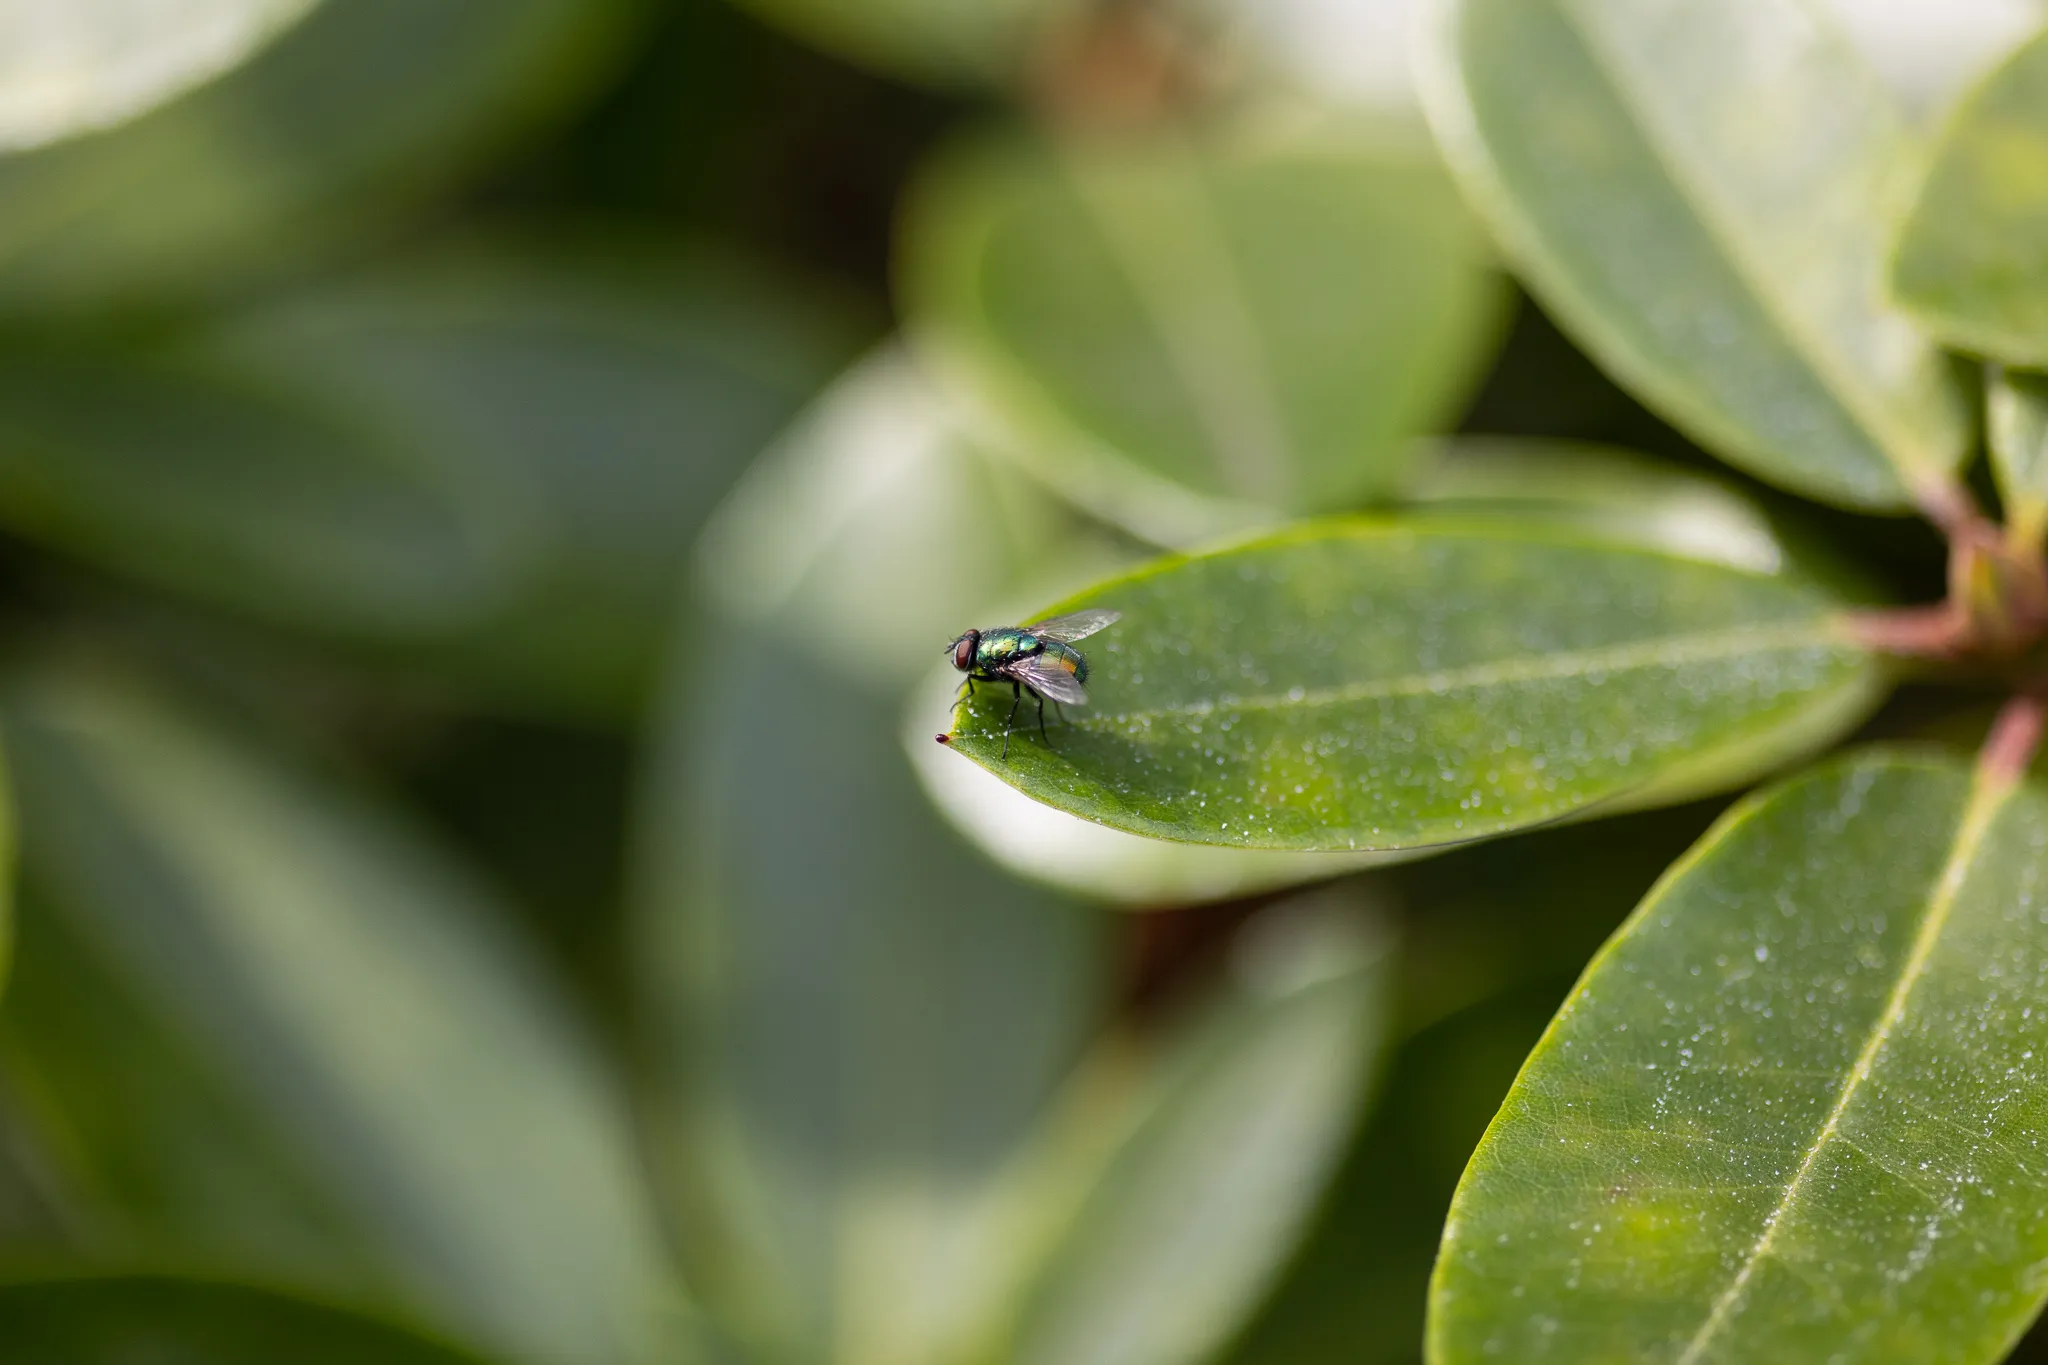
The full version image below I used for testing is an unedited jpeg 5472x3648 pixels at around 12.7Mb
Let’s take a look at the Wasm timings:
Build color data: 11723.6728515625 msCalc new clusters: 68.955810546875 msCalc new clusters: 70.76611328125 msCalc new clusters: 77.3671875 msCalc new clusters: 71.468017578125 msTime taken: 12474msNow let’s try the same thing in the JS code…
Build color data: 11990.40966796875 msCalc new clusters: 261128.44995117188 msCalc new clusters: 212716.10498046875 msCalc new clusters: 192389.60888671875 msCalc new clusters: 183841.77514648438 msCalc new clusters: 177428.12915039062 msTime taken: 1039513msI almost didn’t let this finish because it was taking so long, but as you can see from these numbers we’ve massively improved the performance here (17min down to 12s) but…
A new bottleneck appears!
We used over 90% of the processing time in the Wasm example above to generate the colour data, so can we also move this into Wasm and increase the performance even more? Let’s add some more timing measurements to the build colour data step:
finding canvas element: 47.003173828125 msdrawing image: 3.24609375 msgrabbing image data: 777.634033203125 msmaking color dataset: 13180.24072265625 msSo the problem here looks like the creation of the unique colours dataset:
console.time('grabbing image data');const imageData = ctx.getImageData(0, 0, ibm.width, ibm.height).data;console.timeEnd('grabbing image data');
let colorData = [];
console.time('making color dataset');for (let i = 0; i < imageData.length; i += 4) { const colStr = [ imageData[i], imageData[i + 1], imageData[i + 2], ].join(",");
colorData.push(colStr);}
colorData = [...new Set(colorData)];
colorData = colorData.map((v) => { const rgb = v.split(","); return { r: parseInt(rgb[0]), g: parseInt(rgb[1]), b: parseInt(rgb[2]), };});
console.timeEnd("making color dataset");Let’s try moving this into wasm too and see if we can improve performance in this section of code. I’ll change the parameters of our find_colors function to take in the 2D context and the image dimensions:
const result = wasm.find_colors(ctx, ibm.width, ibm.height);We’ll mirror this in the wasm code as follows:
pub fn find_colors(ctx: &CanvasRenderingContext2d, width: u32, height: u32) -> JsValue {CanvasRenderingContext2d is an additional import from the web-sys crate that will give us access to the canvas context and we can use this to access the image data directly from wasm the way we were previously in the JS, we’ll replace these two lines:
let colors: Vec<Color> = serde_wasm_bindgen::from_value(color_data).unwrap();let mut clusters: Vec<Color> = serde_wasm_bindgen::from_value(k_clusters).unwrap();With the following:
console::time_with_label("grabbing image data");let image_data = ctx.get_image_data(0.0, 0.0, width as f64, height as f64).unwrap();
let color_data = image_data.data();console::time_end_with_label("grabbing image data");
let mut pixels: Vec<Color> = vec![];
console::time_with_label("dataset iterator");for i in (0..color_data.len()).step_by(4) { pixels.push(Color { r: color_data[i] as i32, g: color_data[i + 1] as i32, b: color_data[i + 2] as i32, });};console::time_end_with_label("dataset iterator");
console::time_with_label("unique");let colors: Vec<Color> = pixels.into_iter().unique().collect();console::time_end_with_label("unique");
let rng = &mut rand::thread_rng();
console::time_with_label("pick 8");let mut clusters = colors.clone().into_iter().choose_multiple(rng, 8);console::time_end_with_label("pick 8");I won’t go over this in too much detail as there’s nothing new other than to say we can remove the serde_wasm_bindgen crate and add in 3 new ones itertools, rand, and getrandom (oddly enough this saves us about ~40kb in the compiled wasm). Again we’re using the large digital camera image of the fly above, so let’s see how it performs:
finding canvas element: 20.951904296875 msdrawing image: 3.18408203125 msgrabbing image data: 887.265380859375 msdataset iterator: 853.27099609375 msunique: 6548.4228515625 mspick 8: 154.05078125 msCalc new clusters: 71.097900390625 msCalc new clusters: 73.0341796875 msCalc new clusters: 70.22412109375 msTime taken: 9207msSo that saved us a few seconds but didn’t give the massive speed-up I might have hoped for. I could try and optimize or replace this call to .unique() which removes all duplicate Colors from the list created to represent every pixel of our image, but we’ve gone from a version of this code that took over 17 minutes to one that can process the image in under 10 seconds, so I’m happy with that.
This post is over 3000 words at this point so thanks for reading this far, I’m actually surprised at just how much of a speed-up I was able to achieve with WebAssembly, hopefully, you got something out of reading this too :)